
Hey guys! It's been a while since I shared a little behind the scenes in my design process and as I've shown you the children's book I've been working on very recently, I thought you might be curious to see how I illustrated it! Haven't seen the book yet? Check it out on my website :)


You might call me old fashioned, but to me, sketching out my ideas on paper is by far the best thing to do when starting a project. I've tried a few times to sketch using my graphics tablet on Photoshop, but it's just not the same. So before working on the illustration digitally, I've been showing sketches to my client for approval. You can see that I had a pretty good idea of the layout already.


Right, this might look a bit messy to you, but it's basically all the drawn shapes as outlines. Depending on the project and the illustration's style, I find that not thinking about colours straight away helps me to concentrate on the shapes themselves. So in the book I illustrated, all the illustrations started out like that! I have to say, it's quite therapeutic to just follow the sketch, drawing away with some music in the background. Once I'm happy with everything, I start thinking about the overall artwork.


As it was one of the last illustrations in the book, I had already put together a colour palette that I wanted to stick to, so I just had to use the same colours as on the previous pages. I started out with the main characters as I didn't want to have the colours in the background clashing with the ones at the front! Toucan always has the same colours, so I coloured her first and carried on with the family.


Then I look at the details all around the main elements and I usually try to make sure that there's enough contrast between all the individual elements so that everything is clear and balanced. The main thing is to make sure that the important graphics are standing out at a first glance.


When I'm pretty happy about the whole scenery, I adjust the background's colours and I start adding the text or extra elements needed on the illustration. It's quite fun to see it all coming together this way, even more when you look at the first steps which don't look very appealing! Before finalising an illustration, I make sure to check that everything is at its right place and it's at this stage that I amend/move around shapes and graphics. Sometimes I need to have another look at it and check that the layers are ordered properly so that none of the fence's pieces are behind a bush for example.

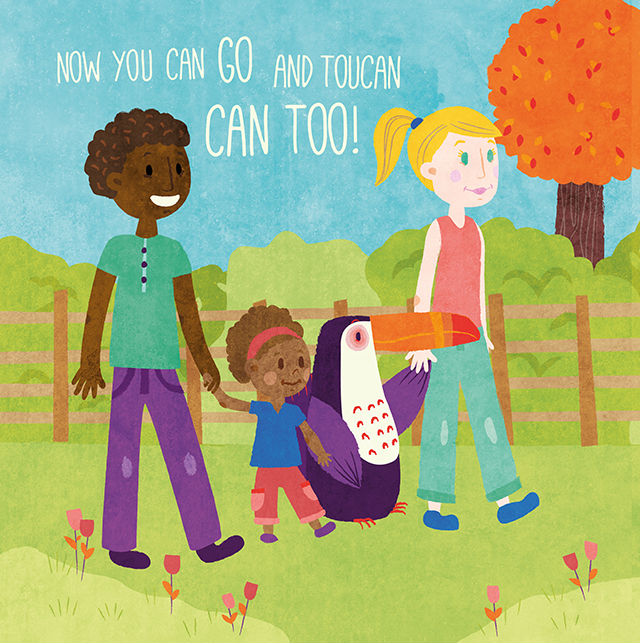
Tadaaa! Again it depends on the style we agreed on with my client, but for this particular project, we decided to add some texture on the actual elements as well as on top of the illustration. Can you see how Toucan's head is no longer smooth for example? That's a very handy tool in Illustrator that I like to use from time to time which changes the outline of your shapes and roughens them in different ways. Here's the one I used: Window > Brush Libraries > Artistic > ChalkCharcoalPencil. The texture on top is a Photoshop file with an overlay effect.
Hope you found it interesting and feel free to get in touch if you have any questions!

No comments:
Post a Comment
Note: only a member of this blog may post a comment.